Getting Your Car Audio System Components to Work Together
The Best Car Audio System
In order to get the most out of your custom car audio system you need to do a little planning. Unlike home audio components, car audio components do not have the same connection standards, input levels and output levels. Have you ever connected a home stereo CD player to a home stereo amplifier and then had to adjust the levels to make them work? Of course not. But you will have to in car audio. I won't get into the details of each component right now but I will tell you what to look for in each component in terms of level setting.
Head Unit
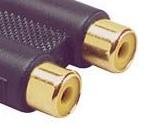
This is the term for your in-dash radio source unit, whether it be CD, cassette or whatever. The back of the aftermarket radio should have at least one pair of RCA jacks (shown below).
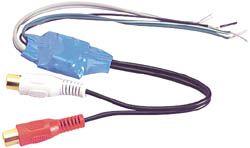
If it doesn't then you will need a speaker level to RCA (low level) converter such as the one below.
The low-level music signal travels out of the radio through these jacks into RCA cables (shown below), and then on to your next component (equalizer, crossover, amplifier, etc.).
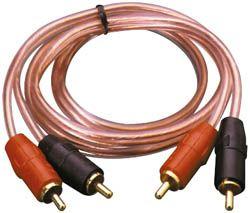
Most car audio components are "unbalanced" and will use these simple cables. The specification you will want to look for on the head unit is the "output voltage". The minimum is usually 1/2 volts but 2 volts and above is common in high end units. More is better in this case. You want a high output voltage to help minimize the noise in your system. A higher output voltage doesn't always mean your system noise will be lower but it helps. I would not consider a low output voltage to be a "deal killer" unless you plan on competing in car audio competitions.
Signal Processors
Crossovers, equalizers and other signal processing unit will have two specifications. An input voltage and an output voltage. You want to make sure that the input section of your signal processor can handle the output voltage of your head unit. If your head unit output is 4 volts but your signal processor can only accept 2 volts then you might be in for some overload problems. As long as your head unit output voltage is within the voltage that your signal processor can handle you will be OK. Your signal processor input voltage will have an adjustment feature that will help you match the two voltages. The output voltage of the signal processor will be similar to the head unit output voltage. The more the better. It is probably less critical to have high voltage output here if your signal processor is near your amplifiers. This because there will be less chance of noise radiating into the signal cable over such a short distance.
Amplifiers
Amplifiers have an input voltage range much like signal processors. Again, you want to make sure that the input section of your amplifier can handle the output voltage of your head unit or signal processor. As long as the input voltage of the previous component doesn't exceed the range of your amplifier you should be OK.
Level Setting for Beginners
Level setting, done by ear, is more art than science. It can be done using an oscilloscope but since few people have one of those laying around we'll cover doing it by ear. Basically you want to start with the first component in the chain (head unit) and work your way to the last component (amplifier).
- Start by turning all of the input level adjustment knobs (gain controls) on your components fully counter-clockwise (to their minimum setting). Set the tone controls (bass, treble, loudness) on your head unit to no boost (bass and treble level = 0 and loudness is off). Make sure your fader and balance controls are set to the middle position. If you have more than one RCA pair you will want to set each gain adjustment separately.
- Next set all of your equalizers settings (if you have an equalizer) to the center (detent) position so they produce no boost or cut. What we want is as pure a signal as possible.
- Put in some good quality source material, preferably a CD with strong output and a clean recording. Hard rock would be a bad choice here. Try something cleaner, maybe acoustic, that you're familiar with.
- Turn the deck's volume up slowly until you begin to hear distortion. When you hear it, stop and back off slightly until you no longer hear it. If you don't hear distortion, even when the volume is all of the way up then you have a quality head unit. That's what we're looking for.
- Now with your head unit at maximum undistorted volume move on to the next component. Adjust it's input gain until you begin to hear distortion. Back off slightly.
- Continue this process until you have all of the components in the chain at their maximum undistorted level.
- When you reach the amplifiers you may need to wear earplugs to adjust them to their maximum level. As before, turn up the gain until you hear audible distortion.
That's it. Play some music and verify that everything sounds right. Congratulations! You've just learned to properly adjust the settings on your car audio system.

